Easily send beautiful and templated emails with Java (Spring Boot)


Toby Christopher
9 min read
In every way transactional emails are important to engage with your audience. Either with existing or potential customers your products will talk to them via email. Not everytime, but most of it. That's why it's so important to have good looking and well structured emails.
While I can not help you with writing the contents of your emails, I may show you how to make them look good on nearly any device and make sending transactional emails from within a Java application an ease. Follow me along.
Introduction
First of all, I want to introduce you to MJML. It's a xml-like markup language that will be parsed to email client friendly HTML. Why not writing HTML in the first place you may ask? Well theres a simple answer to this: compatibility.
As there is no standard for email clients to display HTML emails every client uses its own rendering engine. While this should not be a problem in the modern world, it acutally is, because most clients only support obsolete or legacy HTML, a limited amount of CSS rules and more to consider. So if you don't want to write table structures bigger than your actual project, MJML is your way to go as it's doing this for you. And remember, Outlook needs some extra love when dealing with HTML emails, never forget about this.

Prerequisites
To send MJML templates directly from a Java application we need to parse the MJML to HTML, maybe replace some placeholders or sections and send the mail using an SMTP server or relay, or a mail provider such as Postmark. For parsing and templating we will use the Mailo library.
Regarding to sending emails, I will use a mocked SMTP server by using a quite helpful app named HELO. It's an email debugging tool that offers broken link checking, spam rating, sharing emails and much more. This way, I am not sending out any emails to users and can work with real email addresses while developing and testing.
Next you'll need api keys for the MJML api, which can be obtained here. Just fill in your email address and the keys are on the way to your inbox.
Project Setup
I will demonstrate the whole process using a simple Spring Boot app that sends a link to a given email address. A link sharing service basically. There is no need to use a web framework to use this library.
Let's start by initializing our project. Head to the spring initializr and select the dependencies you want for your project or follow me along and clone my Spring Boot starter project from Github using:
git clone git@github.com:ditschedev/spring-boot-rest-api-docker-postgres-starter.git <your-project-name>
We wouldn't want to use Docker or docker-compose for this example, because we don't need a database. Thats why we can go into our run configuration and set the active profile to
test. This loads theapplication-test.ymlinstead ofapplication.ymland we don't need to use Docker.
Configure Mailo library
Next we will configure the Mailo library. To do this, we first need to add the following dependency to our pom.xml:
<dependency>
    <groupId>dev.ditsche</groupId>
    <artifactId>mailo</artifactId>
    <version>1.1.3</version>
</dependency>
If your IDE does not automatically sync new dependencies added to your pom.yml you may need to run mvn install in order to download the package files.
Spring Boot configuration
Let us continue by creating a configuration class named MailConfig where we set everything up, that we need. We annotate it with @Configuration to make sure,
Spring is going to pick up the Beans we are defining in here. Technically, we are only defining one Bean in here which will return a MailProvider. This provider
will be a class, which we can autowire in the classes we need it, that'll handle the actual email sending.
@Configuration
public class MailConfig {

    public MailConfig() {
        MailoConfig config = MailoConfig.get();
        config.setTemplateDirectory("/mails/");
        config.setMjmlAppId("YOUR_MJML_APP_ID");
        config.setMjmlAppSecret("YOUR_MJML_APP_SECRET");
    }

    @Bean
    public MailProvider mailProvider() {
        SmtpConfig config = new SmtpConfig();
        config.setHost("host.docker.internal");
        config.setUsername("Linkshare Service");
        config.setPassword("");
        config.setPort(2525);

        return new SmtpMailProvider(config);
    }
}
What are we doing here? As already told, we are defining a Bean called mailProvider which can be autowired to other components in our app. This way we only need to
configure our provider once and can use it everywhere! I set my SMTP information to those from HELO, which are
127.0.0.1 as the host, 2525 as the port, no password and the username describes the folder the mails are landing inside the app. But because we are starting the app
with docker-compose we cannot access the local ip address 127.0.0.1, instead we go around it by using Dockers internal nameserver and use host.docker.internal which
will redirect us to the localhost.
Make sure you set your MJML api keys and SMTP configuration before you send an email or else you'll run into errors and problems.
You may have noticed, that I configured something in the constructor as well. When our configuration is loaded, which is in the beginning of building up the Spring Context, we want our Mailo library to be configured. So we do this here. We just set our api keys for MJML and the root directory in our resources folder, where our templates are going to live.
Testing the configuration
If you want to test the configuration, create a new controller TestController with a single endpoint that sends out a basic email just like so:
@RestController
@RequestMapping("/test")
public class TestController {

    private final MailProvider mailProvider;

    public TestController(MailProvider mailProvider) {
        this.mailProvider = mailProvider;
    }

    @GetMapping
    public void test() {
        Mail mail = MailBuilder.plain()
                .subject("Testmail")
                .to(new MailAddress("hello@ditsche.dev"))
                .from(new MailAddress("hello@ditsche.dev"))
                .body("This is a test!")
                .build();
        mailProvider.send(mail);
    }
}
Now start the application, go to http://localhost:8080/test and you should see a blank page. Shortly after loading the page, you should get a notifitcation from
HELO, telling you that it catched a new email. Let's see, what we produced, shall we?

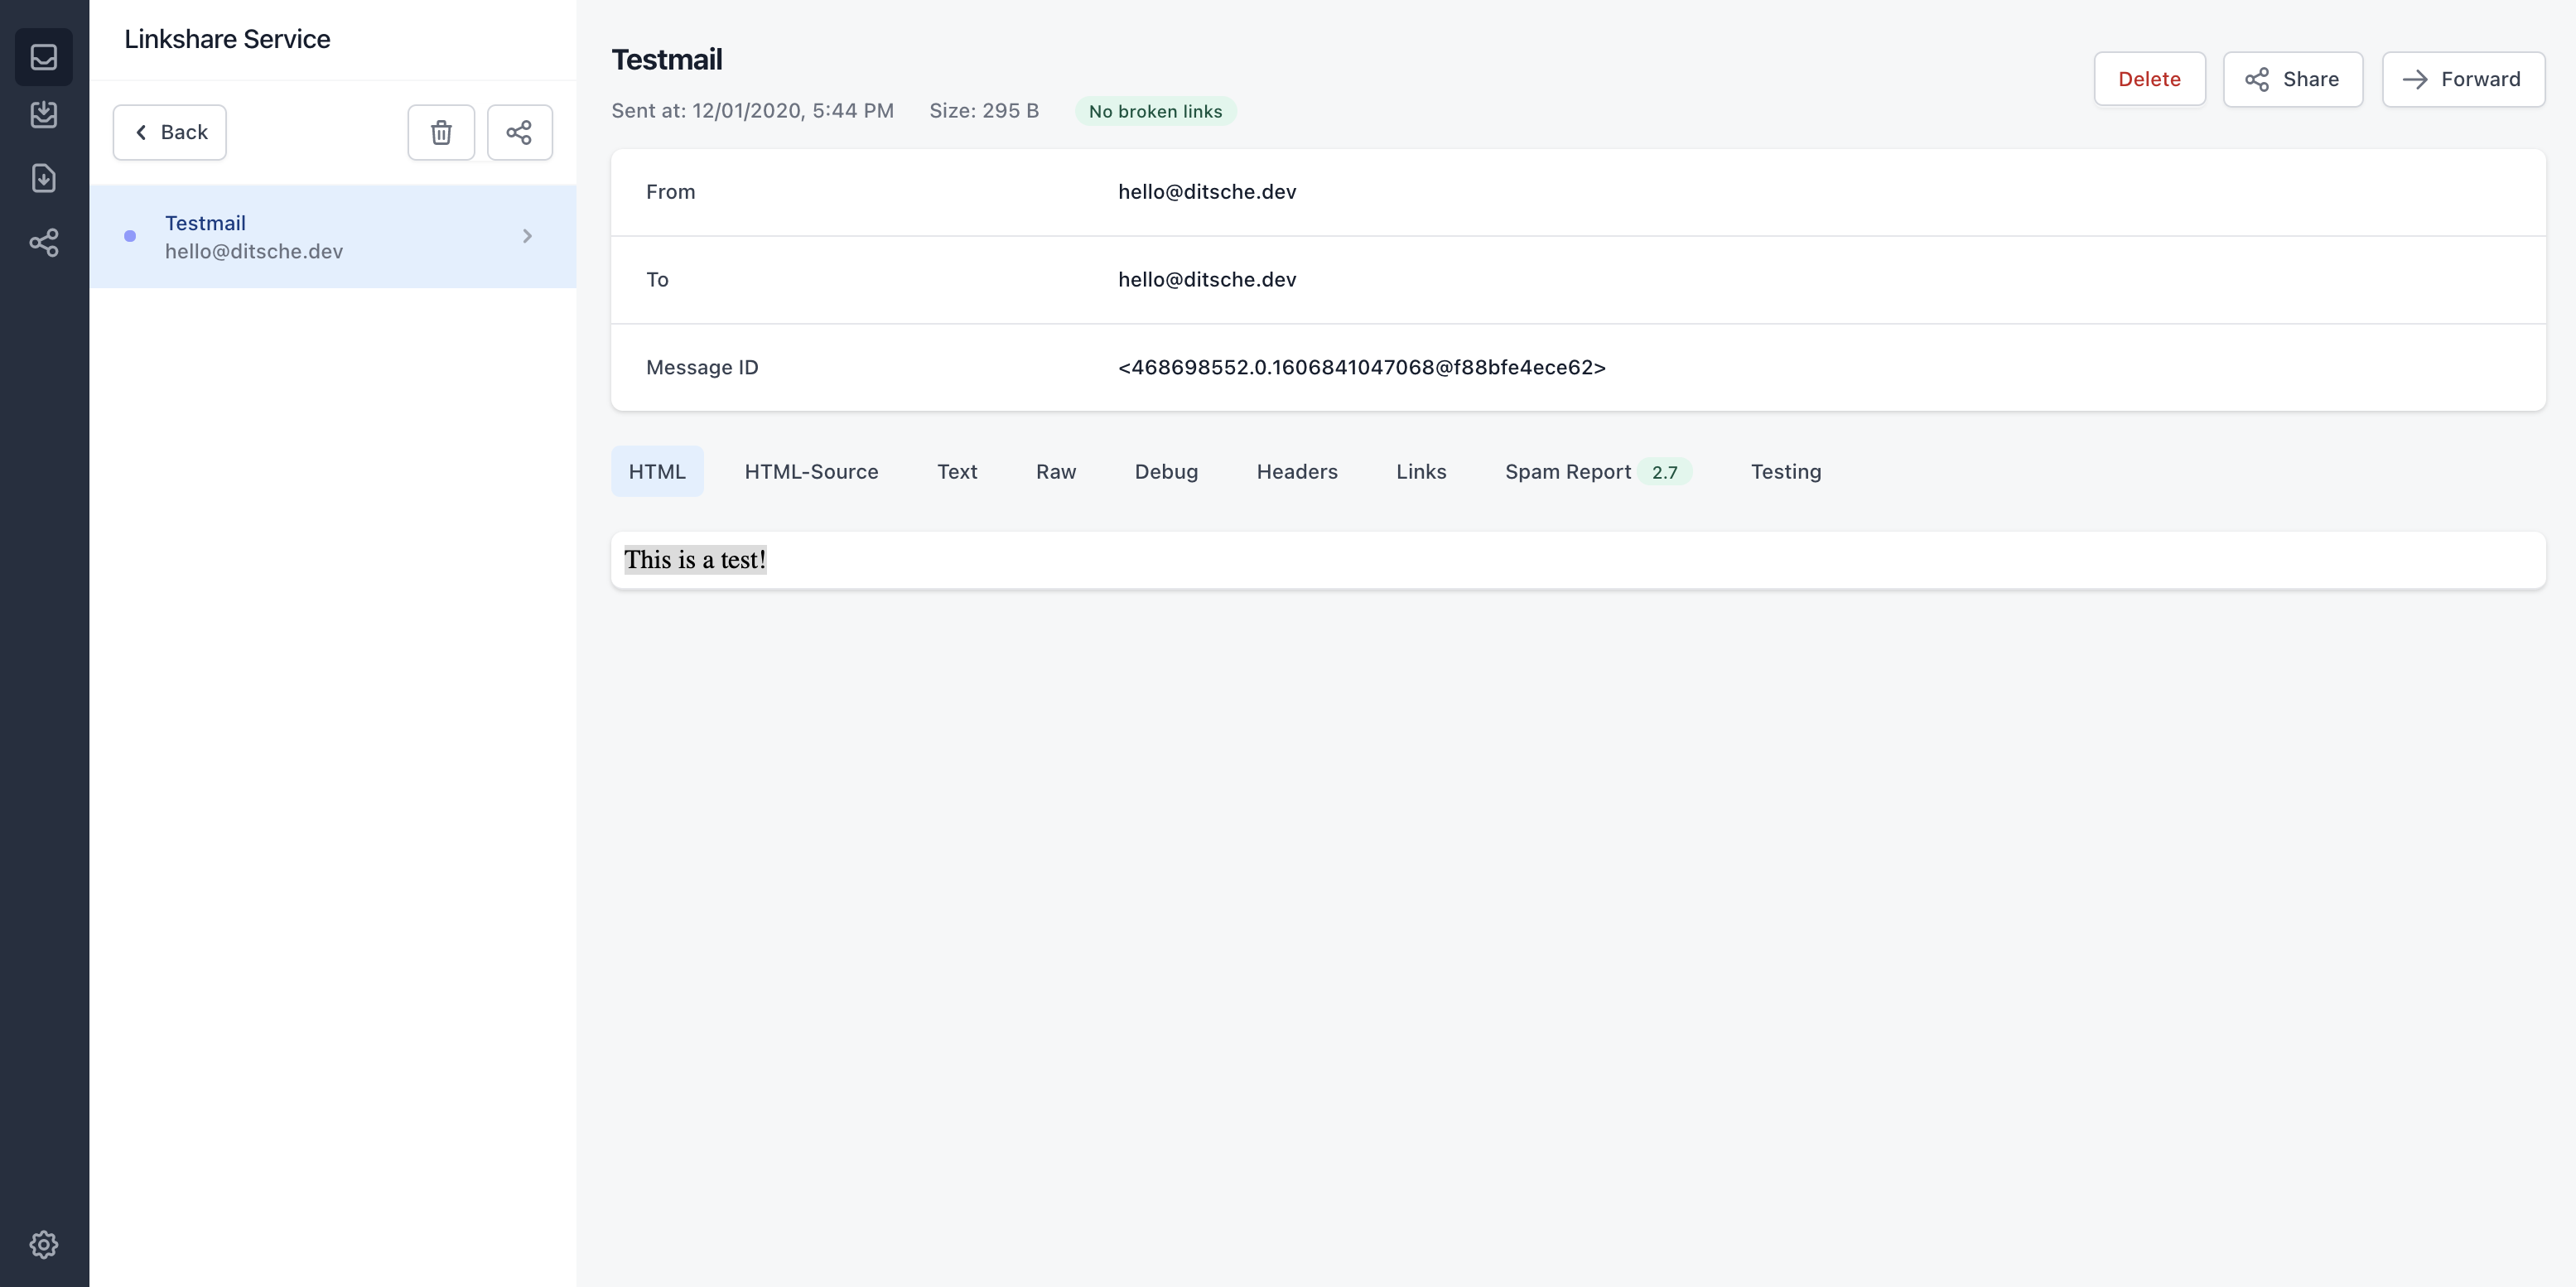
That looks quite right and we can start implementing a more complex scenario.
Sending a templated MJML email
Now to the fun stuff and back to the main idea: a link sharing service. The app should have the following functionality:
- An endpoint which accepts an email address and a link in the body
- The link will be sent to the desired email address in a responsive and modern design
And as you might have guessed, I came prepared and created a simple email with MJML.
Create an email template
First, create a new folder mails in your resources folder of your application. Inside
of this folder create a new file shareLink.mjml with the following content:
<mjml>
    <mj-head>
        <mj-title>Someone sent you a link</mj-title>
        <mj-font name="Inter" href="https://fonts.googleapis.com/css2?family=Inter:wght@300;600&display=swap"></mj-font>
    </mj-head>
    <mj-body>
      <mj-container background-color="#fff" width="720">
        <mj-section background-color="#000" padding="24">
            <mj-column>
            <mj-text align="center" color="#fff" font-family="Inter" font-size="21" font-weight="600" letter-spacing="12">linkr</mj-text>
          </mj-column>
        </mj-section>
            <mj-section background-color="#fff" padding-top="42px">
            <mj-column>
                <mj-text font-family="Inter" font-size="21" color="#101C39">
                    Someone shared a link with you.
                </mj-text>
              <mj-text font-family="Inter" line-height="21px" color="#718096">
                Hey there!
              </mj-text>
              <mj-text font-family="Inter" line-height="21px" color="#718096">
                A stranger sent a link to your email address <b>{{ email }}</b>. While it is normally a bad idea to click on a link in an email by an unknown source, this link is totally
                safe (probably). So why not find out yourself by clicking the button below:
              </mj-text>
              <mj-button font-family="Inter" font-weight="600" align="left" background-color="#111" color="#fff" href="{{ url }}">
                        Open link
              </mj-button>
              <mj-text font-family="Inter" font-size="12" line-height="18px" color="#aab2bd">
                If you are not able to click a simple button, just copy this link: {{ url }}
              </mj-text>
              <mj-divider border-width="2" border-color="#ebeef2"></mj-divider>
              <mj-text font-family="Inter" line-height="21px" color="#718096" align="center">
                Sent with <b>linkr</b>, the ultimate phishing tool!
              </mj-text>
            </mj-column>
        </mj-section>
      </mj-container>
    </mj-body>
</mjml>
If you look closer, you'll see, that we have two placeholders inside of our markup. These are:
- {{ email }}: The target email address, so the email address receiving the shared link
- {{ url }}: The url of the link that is shared
Introducing: The service layer
We want to make a clean cut between controller and business logic. Thats why we wouldn't want sending an email directly in a controller method, rather, we want to have
a dedicated MailService class which will handle this. This way we can handle sending mails asynchronously rather than waiting for parsing content and the reply of the
SMTP server. So let us define a MailService class, which sends an email asynchronously using our mailProvider bean.
@Service
@Slf4j
public class MailService {

    private final MailProvider mailProvider;

    public MailService(MailProvider mailProvider) {
        this.mailProvider = mailProvider;
    }

    @Async
    public void send(MailBuilder mailBuilder) {
        if(mailProvider.send(mailBuilder))
            log.info("Email sent successfully");
        else
            log.error("Error sending email..");
    }
}
We want to pass the MailBuilder instead of the builder, because the final rendering will happen in the build method of the MailBuilder.
Creating an endpoint
Second, we need an endpoint that'll send the email to the desired address. As this is not the main concern of this post, here is the dto for the incoming request and controller handling the request:
@Data
@NoArgsConstructor
public class ShareLinkDto {

    private String email;

    private String link;

}
@RestController
@RequestMapping("/share")
public class ShareController {

    private final MailService mailService;

    public ShareController(MailService mailService) {
        this.mailService = mailService;
    }

    @PostMapping
    public ResponseEntity<?> shareLink(@RequestBody ShareLinkDto shareLinkDto) {
        MailBuilder mailBuilder = MailBuilder.mjml()
                .subject("Someone shared a link with you!")
                .to(new MailAddress(shareLinkDto.getEmail()))
                .from(new MailAddress("hello@ditsche.dev"))
                .param("email", shareLinkDto.getEmail())
                .param("url", shareLinkDto.getLink())
                .loadTemplate("shareLink");
        mailService.send(mailBuilder);
        return ResponseEntity.ok("Queued");
    }
}
This creates an endpoint /share where we can post our created dto. It builds the mail and delegates the builder to the service. That has the following reason: performance.
When the mail gets build there will be an api call to the mjml api which can take some time. To not have this delay in our controller logic, we are running the build in the asynchronous send
method of our MailService.
Putting it all together
The time has come, let's try out our endpoint. Send the following POST body to http://localhost:8080:
{
    "email": "your@email.com",
    "link": "https://ditsche.dev/blog/mjml-emails-with-spring-boot"
}
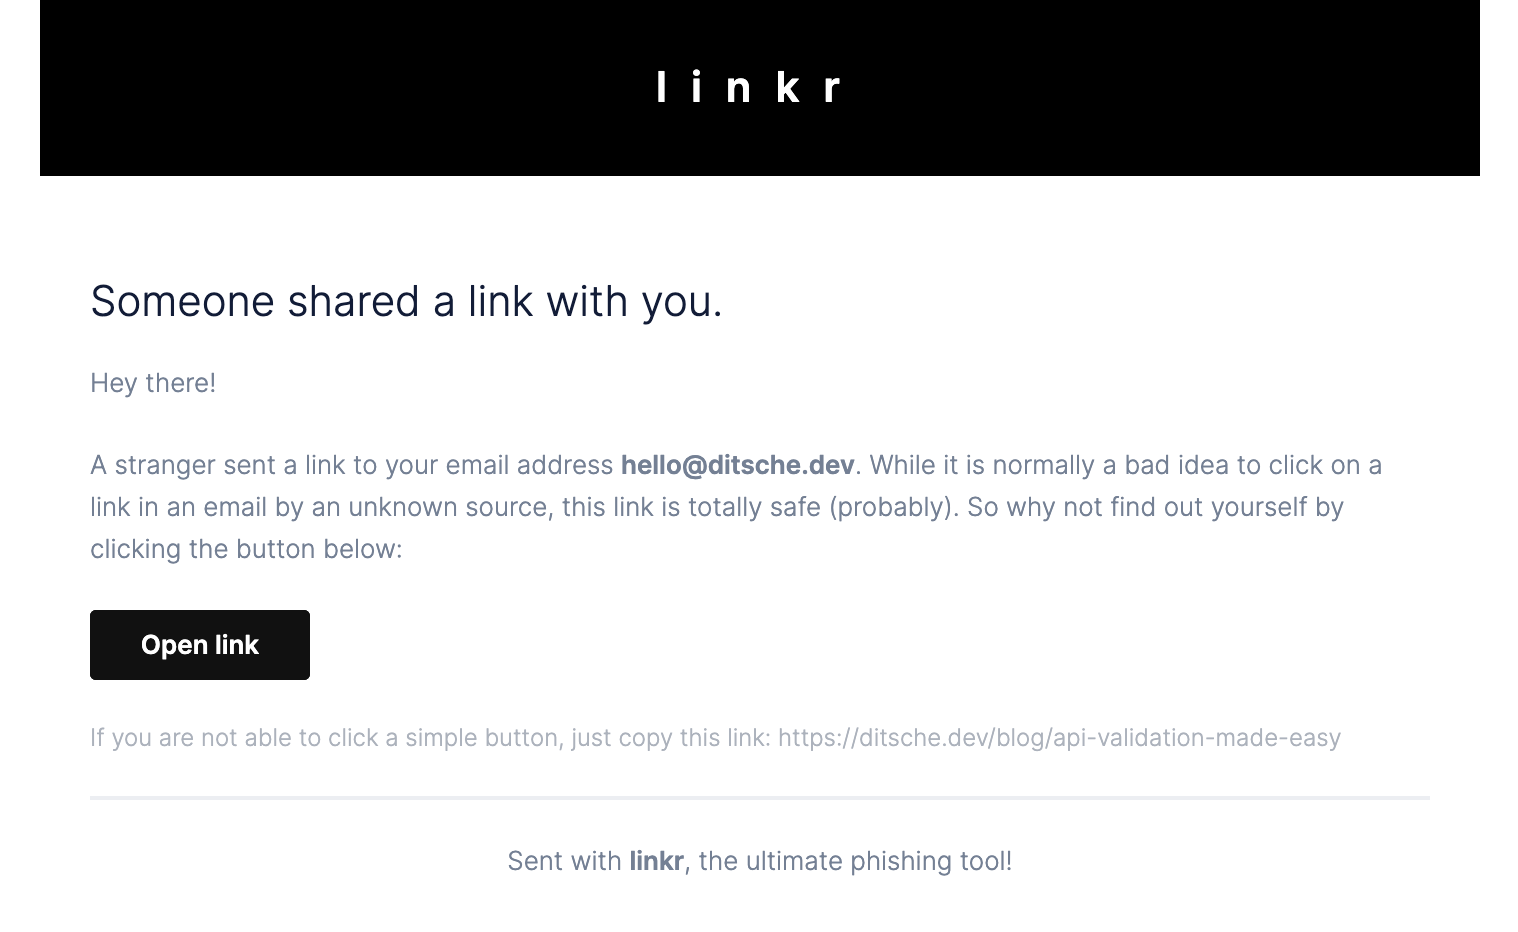
This should display Queued as the result and you should receive an email shortly after containing your link! Here is what it looks like:

Conclusion
Maybe you've got any other ideas for this app, like integrate link shortening and tracking, a personal collection of links, or other cool stuff. Feel free to get the source code from the Github repository for this article and start playing with it!
Thanks a lot for reading!